
Version Tagging
This document explains how to create and use tags to control workbook versions.
Requirements
- To create Public tags, you must have Can edit permissions on the workbook
- To create Protected tags, you must be an Admin or have Can edit permissions for the workbook. The member must also be selected in the Search field or be a member of a selected team.
- To request that a tag be applied to a workbook, the workbook must be shared with the requestor and they must have Can edit permissions.
Introduction
Version tagging allows you to streamline your workbook development cycle using tags to manage, control, and organize workbook iterations. For example, your organization can utilize Development, Staging, and Production version tags to develop workbooks, migrate changes as needed, and control which versions are accessible to specific users.
When you create a tag and assign it to a workbook, you essentially freeze the state of that workbook. The process of tagging a workbook creates a duplicate that can be shared with other stakeholders and users. When you create a tag, you can select a permission level: Public or Protected. Protected tags allow you to restrict access & select the users or teams that can apply a tag on a workbook.
For example, you can create a Production tag and assign it to a workbook that's used by embed users, guests, or other Sigma end users. You can define which users can apply the tag by selecting Protected. Moreover, you can tag additional versions of the same workbook such as Development or Staging. These versions can be used by different stakeholders in your org for review purposes. Once reviewed, you can migrate this copy to Production for your users to consume.
One of the benefits of this solution is your org can modify a Development workbook without affecting the experience of your customers who use the Production version. Once you complete your developmental changes, you can easily update the Production version of the workbook.
Create a Tag
Follow the steps below to create a tag.
-
As an admin, go to the Admin portal and click Tags.
-
Click Create Tag.
-
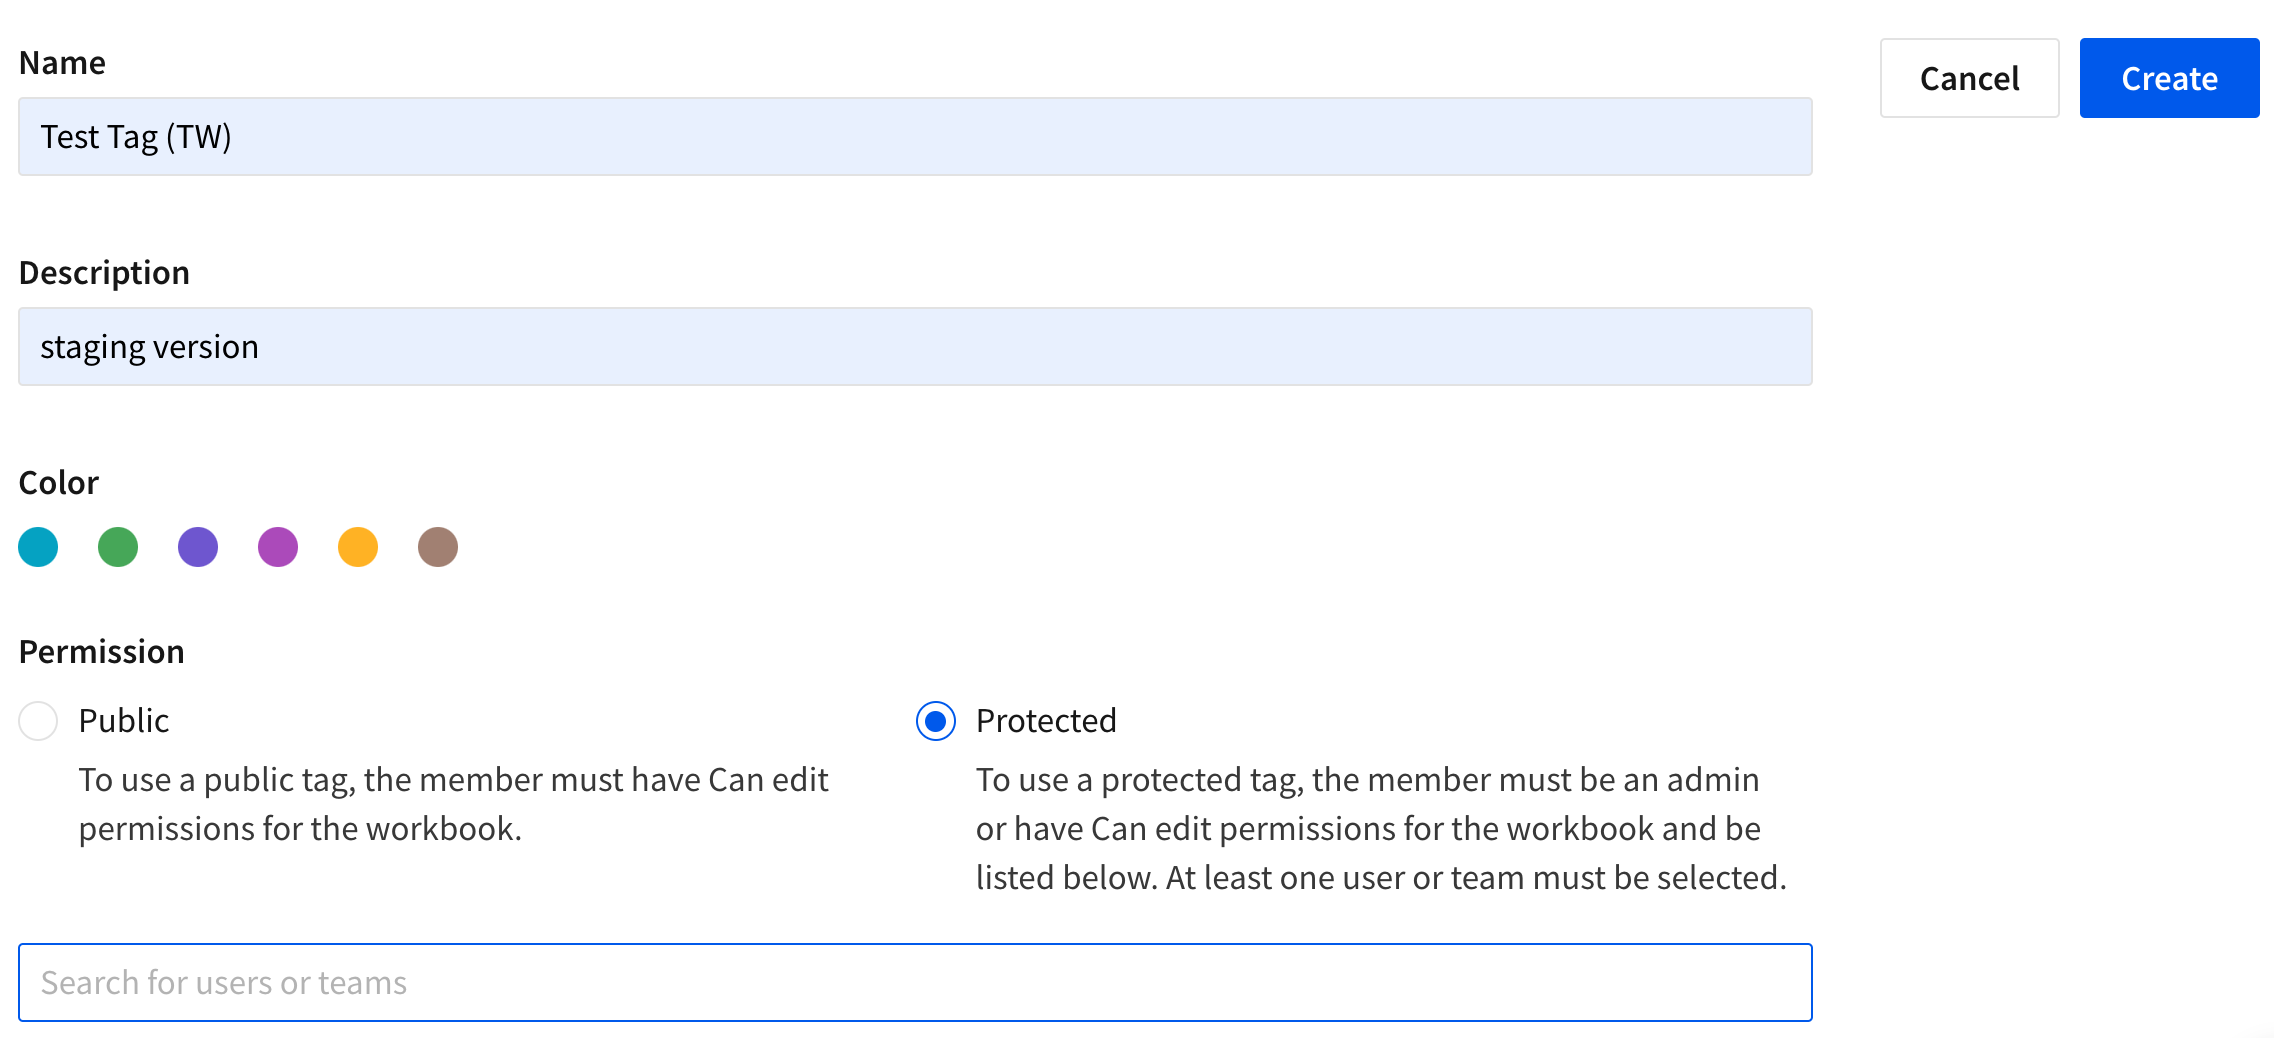
Enter a Name and Description for your tag. These values should correspond to how you intend to use the tag.
The tag name must be unique. It's not case sensitive.
-
Select a color for your tag.
-
Select a Permission.
- Public - To use a tag with Public permissions, the member must have Can edit permissions for the workbook.
- Protected - To use a tag with Protected permissions, the member must be an admin or have Can edit permissions for the workbook. The member must also be selected in the Search field or be a member of a selected team.
If you share the tag with a team, members with Can edit permissions for the workbook can use the tag. Team members with Can view can't use the tag. (This includes all members with a Viewer account type).
-
Click Create.
-
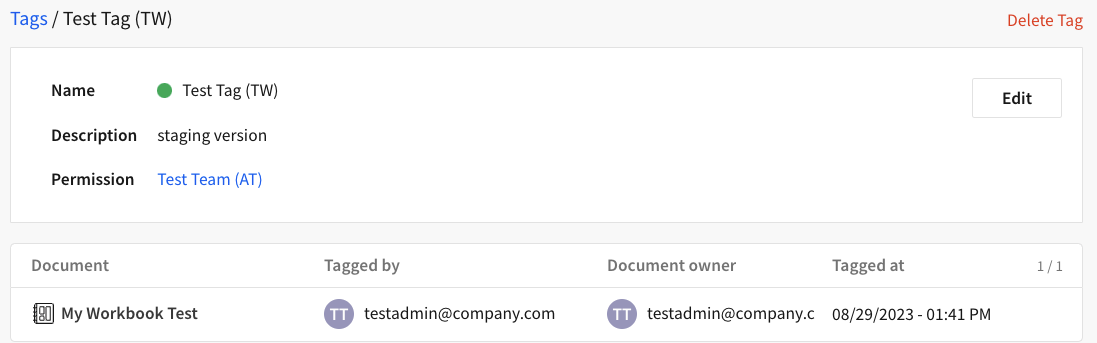
After you create the tag, you can view the teams and individuals who can access the tag in the Permissions field. In the field below, you can view the list of workbooks with this tag.
Tagged Workbook URLs
When you create a tag, the name of the tag is added to a workbook URL as a suffix. In the example below, a staging tag is added to the end of the URL. You can access the staging version by adding staging to the end of the workbook URL.
/workbook/My-Workbook-{workbook_id}/tag/staging
This logic also applies to embeds. The staging tag is added to the URL as a suffix and allows the user to call that specific version of the workbook.
/embed/{embed\_id}/tag/staging
To access a tagged workbook, users must be granted access to the workbook or be the workbook's editor.
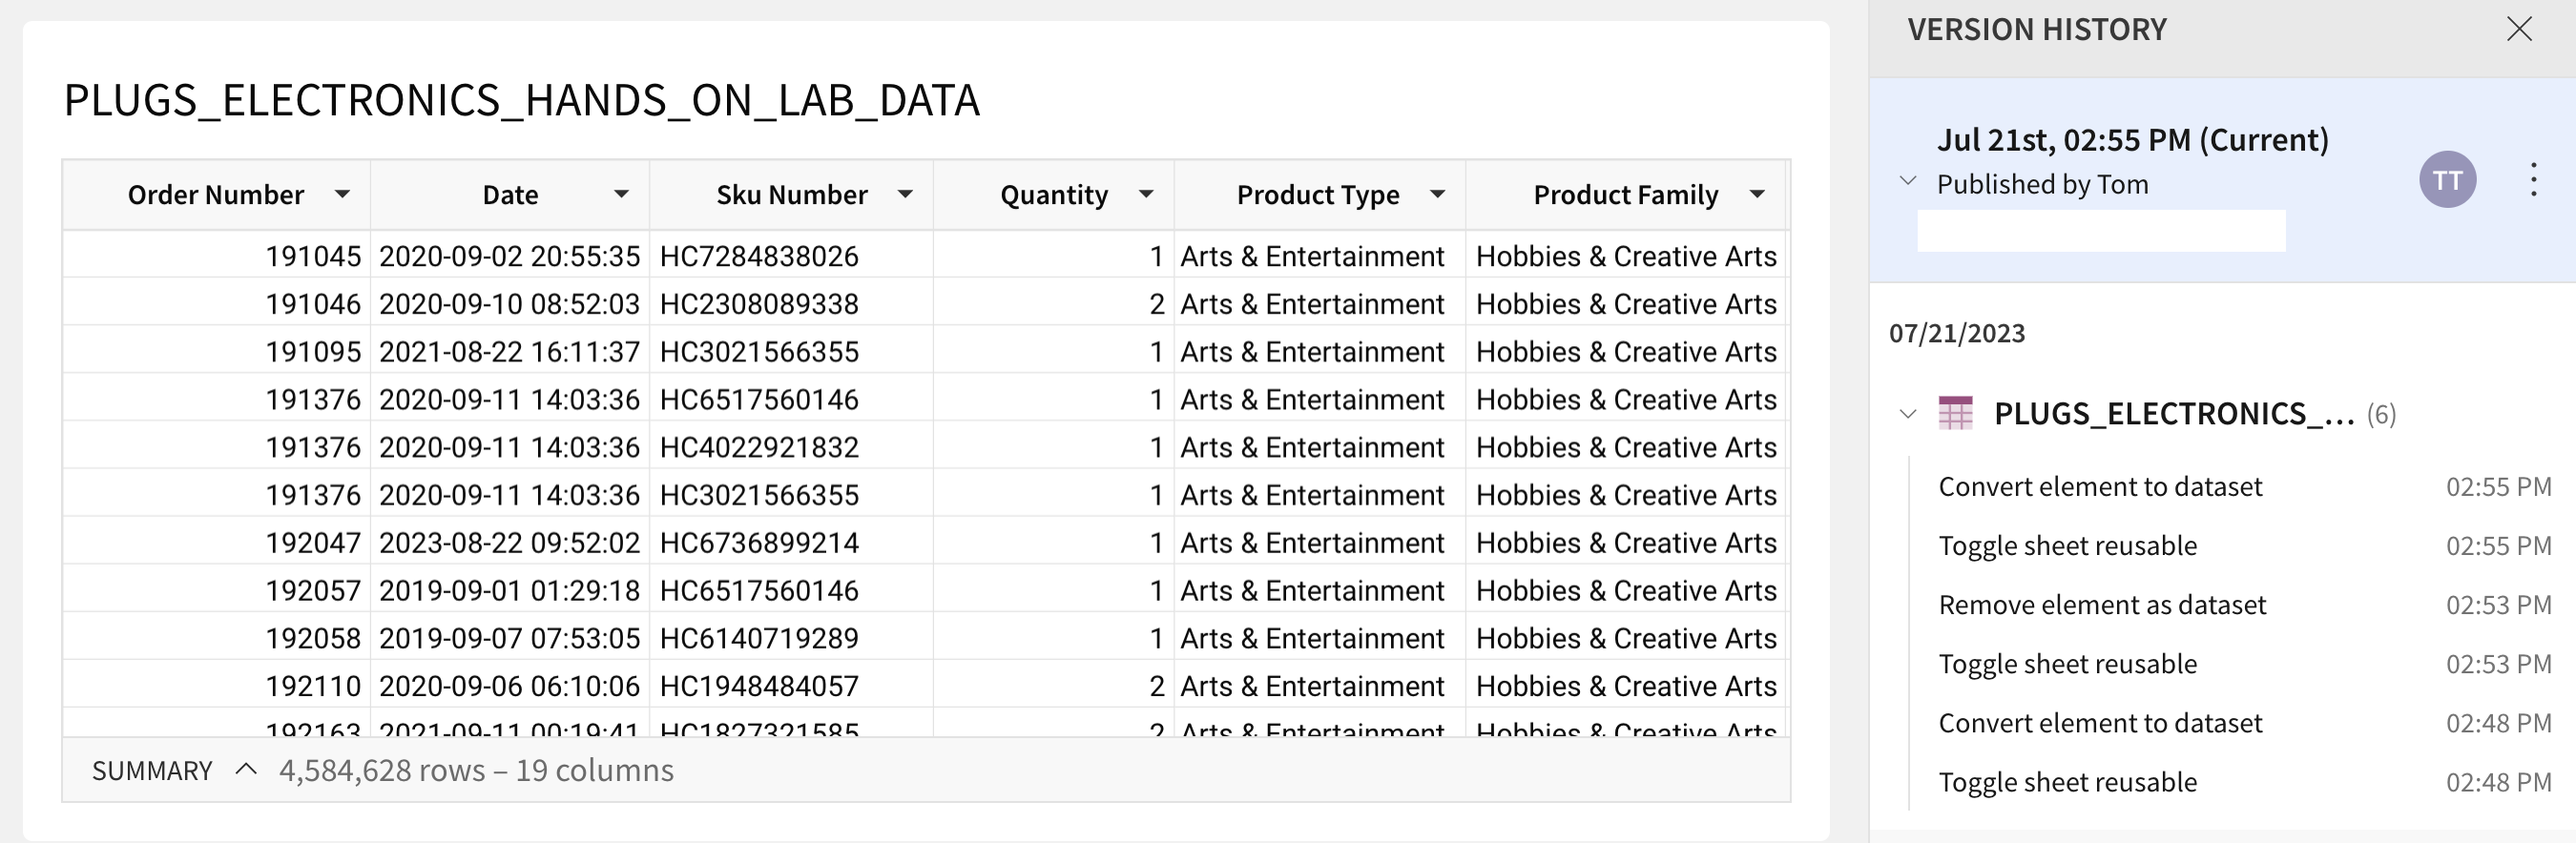
View Tags
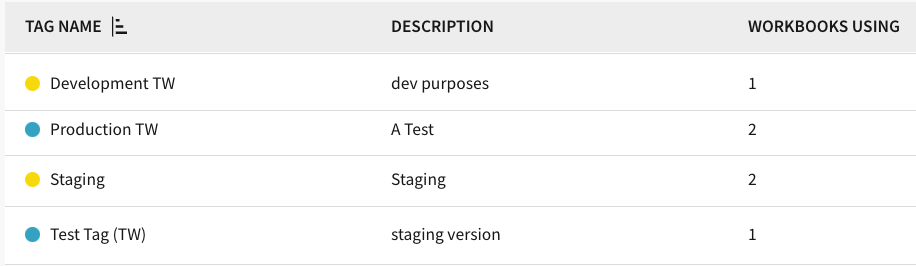
On the Tags tab, you can view a complete list of the tags created in your org. In the Tag Name column, you can click any workbook to open and view it. The Workbooks Using column displays the number of workbooks with that tag.
Apply a Tag to a Workbook
The workbook must be in a published state in order to add a version tag.
To apply a protected tag, you must be an Admin or have Can edit permissions for the workbook and be selected in the Search field or be a member of a selected team.
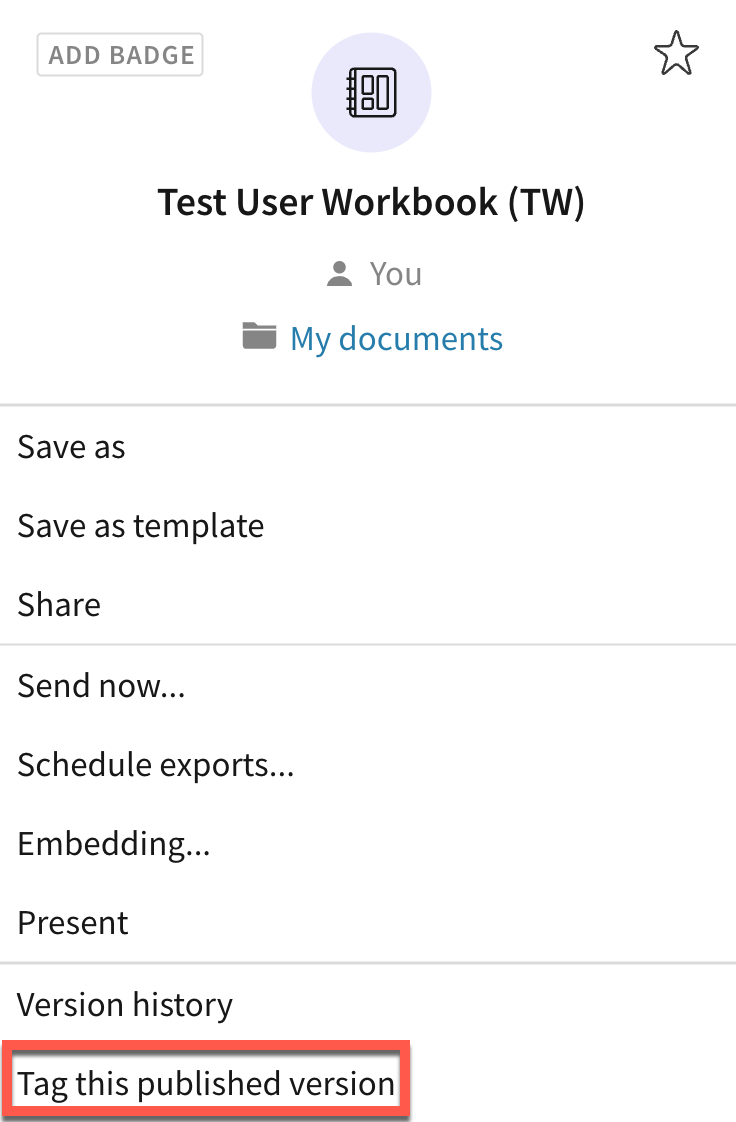
- Open or create a workbook.
- Click the caret next to the workbook name.
- Click Tag this published version.
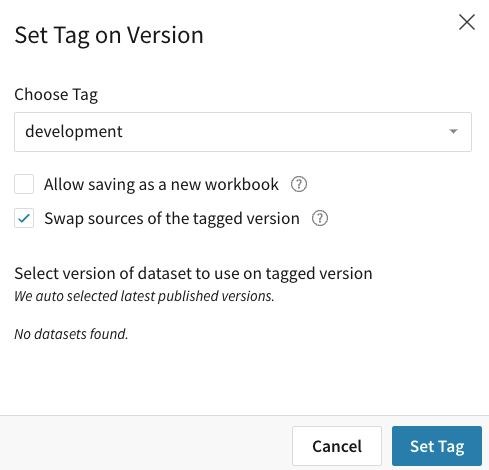
- In the Choose Tag field, select a tag.
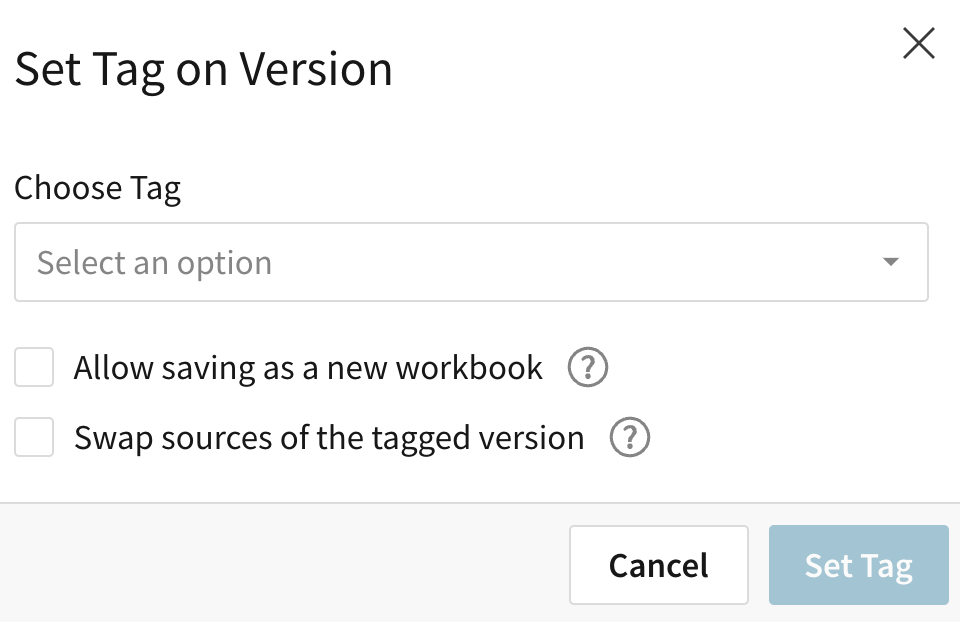
- Check Allow saving as a new workbook if you want to grant Can View permission to all sources used, if the user has permissions for the workbook. If this option is selected, the user can choose Save As option.
- Check Swap sources of the tagged version to select a different source (connection, database, schema) for this tagged workbook. You can browse and select available sources in the dropdown under Sources of Tagged Workbook. Click Swap and tag.
Request protected tag applied to a workbook
Users without permission to use a protected tag can submit a request to set that tag on a specific workbook version.
Requester
To submit a request to apply a tag on a specific workbook version, use the following steps. When a request is made, an email is sent to all the members with access to the protected tag.
To submit a request, the workbook must be shared with you and you must have Can edit permissions. If you don't have those permissions on the workbook, you do not see the option to Tag this published version.
- Open the workbook and click the caret in the header.
- Click Tag this published version in the dropdown.
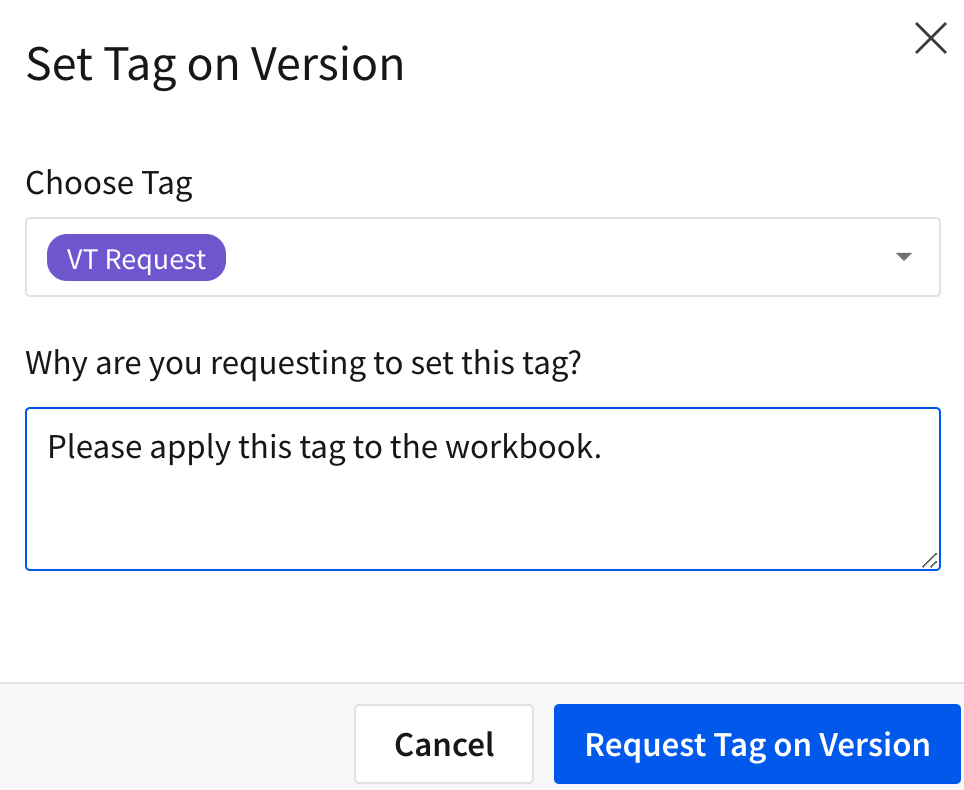
- In the Choose Tag field, select the tag you want to request.
- In the Why are you requesting to set this tag? field, enter the message you want to include in the email request.
- Click Request Tag on Version. This sends an email to members that can approve the request.
Approver
After the request is made, an email is sent to all the members with explicit access to the protected tag.
Follow the steps below to approve a request and apply a tag.
- Open the email.
- Click Respond To The Request.
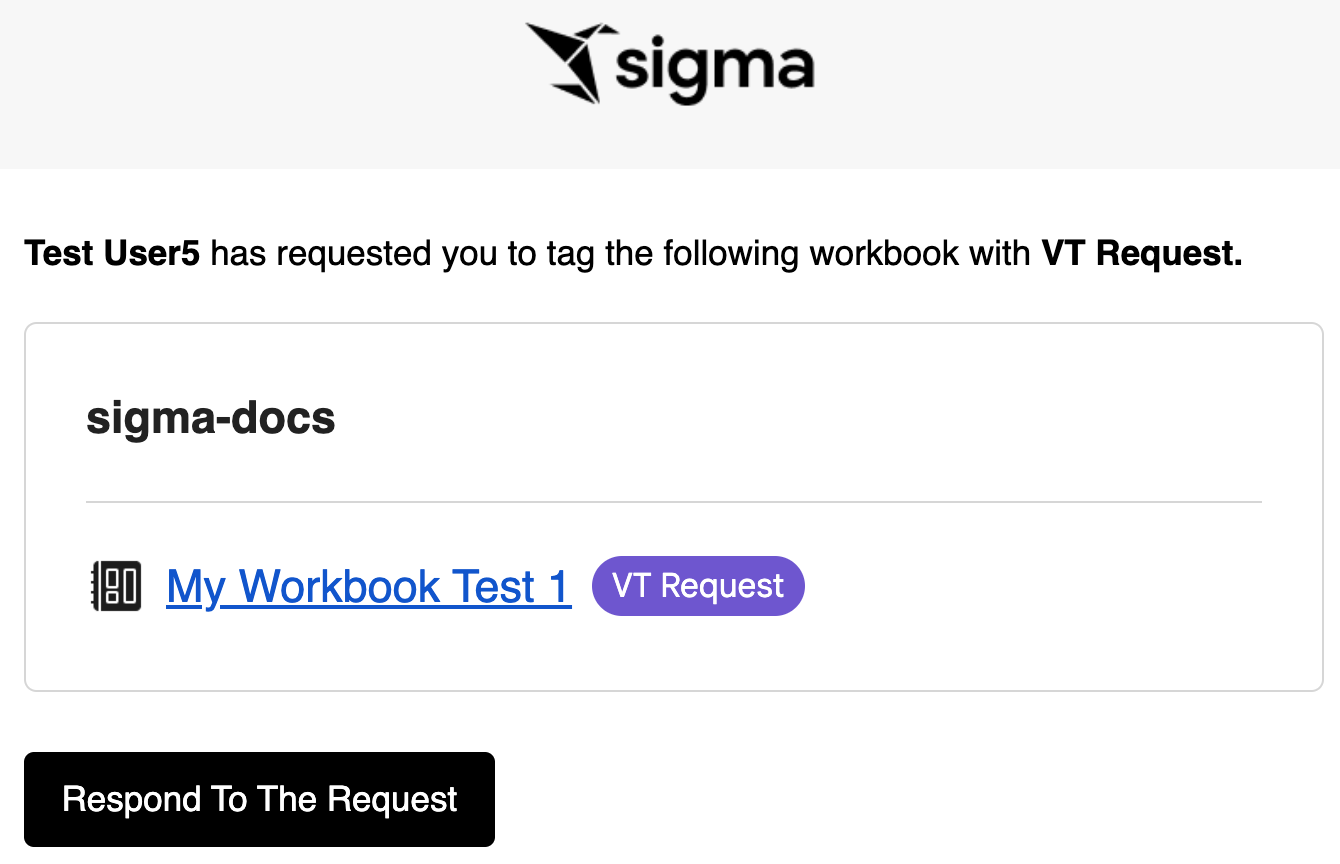
- The link opens the workbook version that the user requested the tag to be applied to.
- To apply the requested tag, click the more menu and select Set tag on this version.
- Select and apply the tag.
Share a Tagged Workbook
Follow the steps below to share a tagged version of a workbook. For a detailed explanation on how to share workbooks, see Share a Workbook.
To share a workbook, you must have Can edit access to the workbook.
-
Go to the share modal.
-
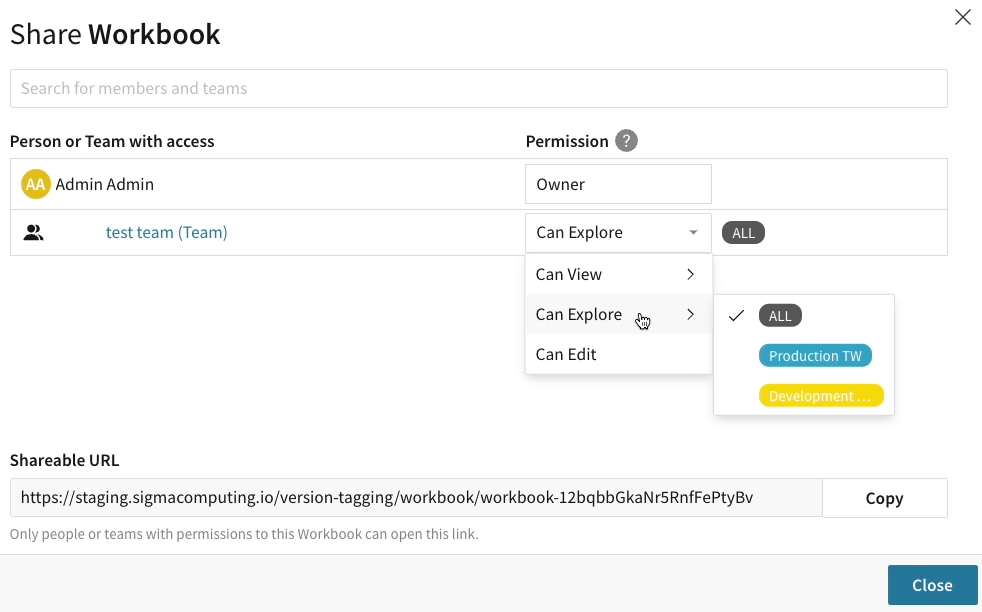
Under the Share modal's Share tab, select the team or organization member with whom you would like to share the tagged workbook.
-
Hover over a permission to select an individual tag, or All tags, to share.
-
Click Save.
Publish a Draft to a Tagged Workbook
When you publish a workbook, it can be used as your development version. The published version of a workbook is where your org can modify a workbook, eventually migrate to production and make available to your users.
Follow the steps below to push workbook changes to tagged workbooks.
-
Open the published workbook that you want to promote to Production, or any version.
No user type can make changes to tagged workbooks.
-
Click Edit and make desired changes to the workbook.
-
Publish the changes.
-
Click the Workbook dropdown and select Tag latest published version or Tag this published version (if there are no previous versions).

-
In the Choose Tag field, select the appropriate tag.
You are essentially tagging the published workbook, which replaces the previously published workbook version. For example, if you add a Production tag to the published workbook, the previous content of the Production workbook is removed and replaced.

-
Check Allow saving as a new workbook if you want to grant Can View permission to all sources used, if the user has permissions for the workbook. If this option is selected, the user can choose Save As option.
-
Check Swap sources of the tagged version to select a different source (connection, database, schema) for this tagged workbook. You can browse and select available sources in the dropdown under Sources of Tagged Workbook. Click Swap and tag.
-
Click Set Tag.
-
Users can refresh the workbook to see the new changes.
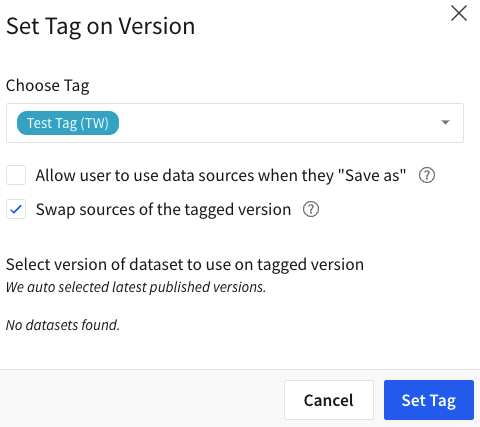
Select Dataset Version
If you follow the steps to apply a tag to a workbook, but the workbook uses datasets as a source, a different modal appears.

In the Datasets Used in Workbooks field, Dataset A & B default to the current version. You can click the dropdown to browse and select older versions of the datasets to use as a source for a tagged workbook.
You can also swap data sources if you think a different source contains recent or valid data.
Swap the Connection Path
To swap a connection path for a tagged workbook, first follow the steps to apply a tag to a workbook. You can also tag the workbook in the Choose Tag field.
If a tagged workbook has a CSV, you can't swap the connection path.
-
Check Swap sources of the tagged version and click Set Tag.
-
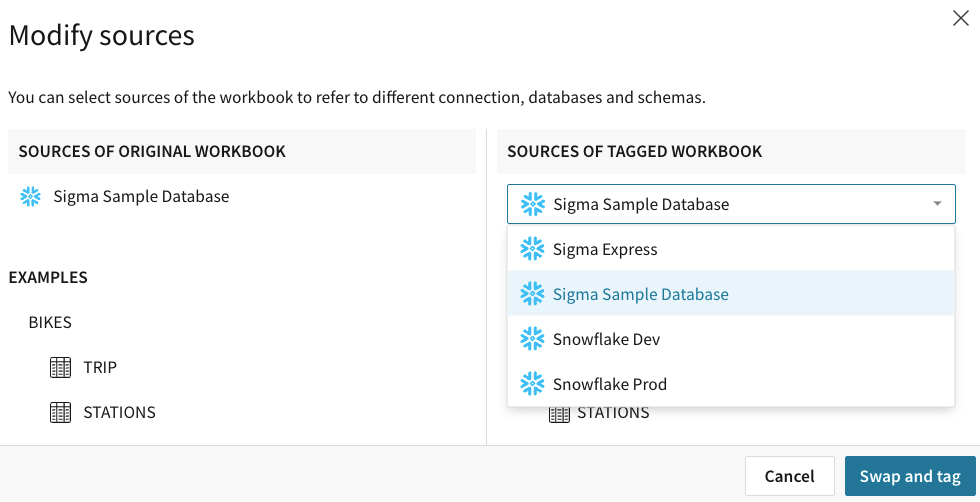
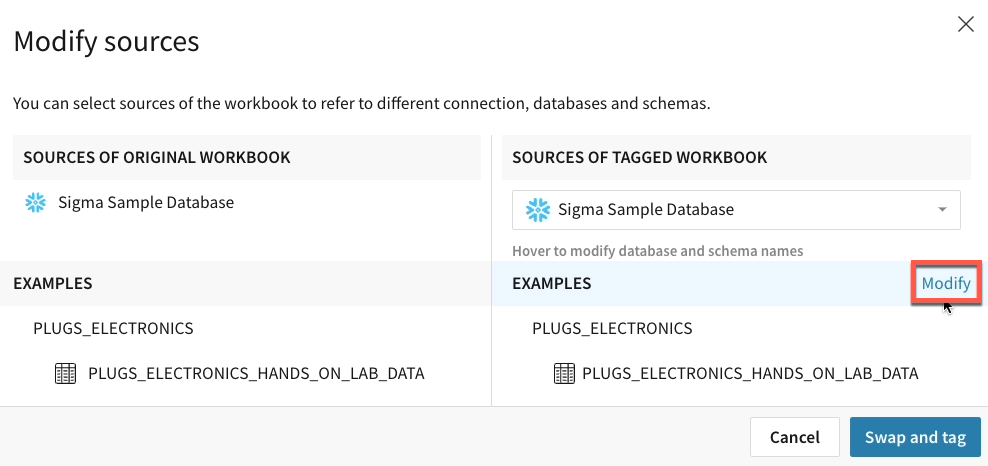
In the Modify sources modal, click the dropdown under Sources of Tagged Workbook to change the data source.
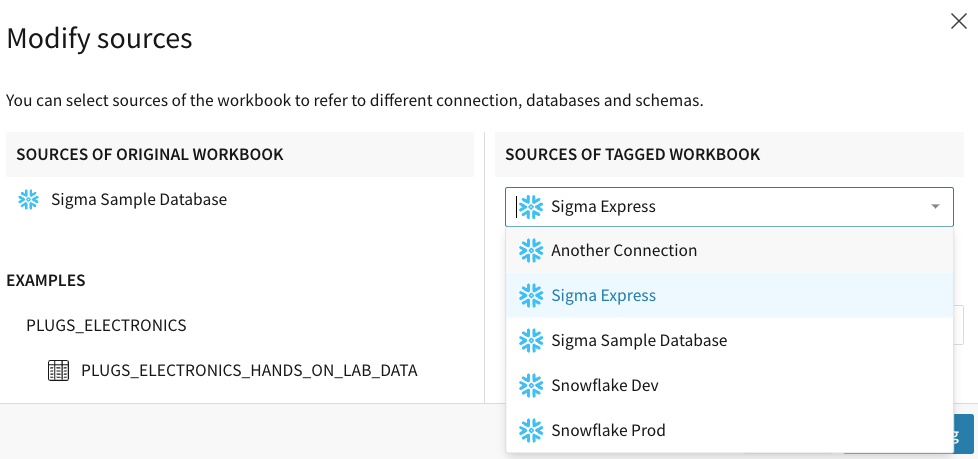
-
Click Set Tag.
-
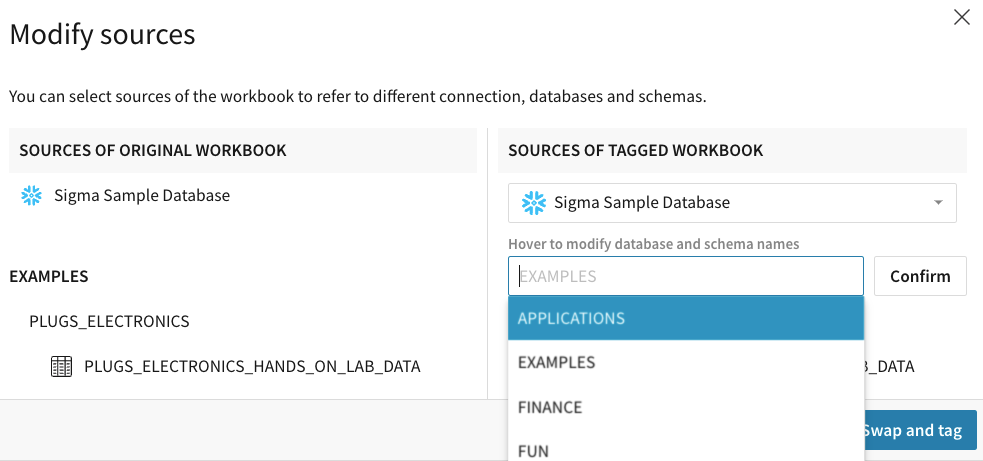
Click Modify to browse and select database or schema.
-
After you click Modify, you can browse and select an available source. Click Confirm to save your changes.
-
Click Swap and tag.
Select an Existing Tag
After your org has created tags, you can browse a list of tags from a workbook. To browse tags from a workbook:
- Open or create a workbook.
- Click the Production label at the top of the workbook.
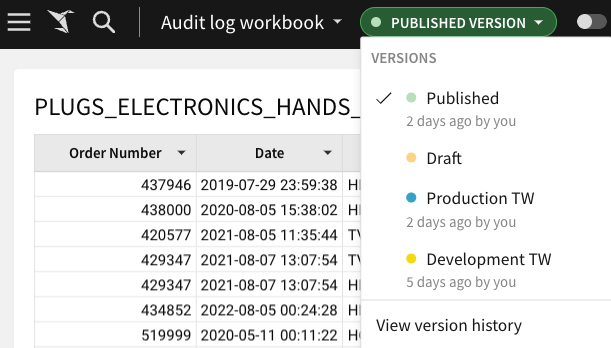
- Select a tag to add to the workbook.
Version tags with input tables
Tags can also be used on input tables. When you tag a workbook with input tables, the structure of the input table is copied over without any of the data. Setting a tag creates an independent version of any input table in this workbook. To include the current data in your input table, manually copy & paste the data after you apply the tag.
To apply a tag to a workbook with input tables, follow these steps:
- On a workbook with input tables, click the caret in the header and click Tag this published version in the dropdown.
- Click Ok to acknowledge the informational modal (discussed above).
- In the Choose Tag field, select the appropriate tag. Check Swap sources of tagged version to change the data source.
- Click Set Tag.
- In the Sources of Tagged Workbook field, select a new data source.

- Click Swap and tag.
Version tagging in embeds
In an embedded environment, you can use version tagging to manage promoting content between environments, but you might also want the ability to leverage the source control platforms already integrated in your development workflow, such as GitHub or Bitbucket. You can do so with Sigma's REST API and third-party control systems.
For a guided tutorial, see QuickStart - Embedding 08: Version Tagging.
Updated 8 days ago